A lot of people prefer to work with python over any JVM based languagues, especially data analysts and data scientists. Simply because python is very robust, flexible, easy to pick up and has a humungous number of libraries available for almost everything you want to do with it. For this reason, spark provides a python interface, called PySpark.
In our previous blog post, we covered how to set up apache spark locally on a linux based OS. In this post, we will extend that set up to include Pyspark and also see how we can use Jupyter notebook with apache spark. Do note that pyspark has a slight performance hit over spark on scala, but if you need to rig up something quickly, pyspark does the job for you.
As mentioned, this guide is an extension of previous set up, so please follow that to set up spark first and then follow the below steps to enable pyspark support.
I am again going to make it a little more work than actually required, just to ensure easy switch between environments later.
Installation Steps
Step 1: Create directories
You must have already created two of the required directories as per previous post. For python, we will create one more directory to hold the python environments that we create.
mkdir -p ~/Applications/python_environmentsStep 2: Install Python
We will use Miniconda python and enable spark to use one of the custom environments that we create. Let's download the installation script from anaconda repo.
wget https://repo.anaconda.com/miniconda/Miniconda3-py38_4.8.3-Linux-x86_64.sh -P ~/Downloads/packagesYou can also use anaconda installer, which comes with all the popular libraries packaged, but I suggest Miniconda as it helps you keep track of the dependencies of your project.
Let's install the downloaded package
bash ~/Downloads/packages/Miniconda3-py38_4.8.3-Linux-x86_64.sh -b -p ~/Applications/extracts/Miniconda3-py38_4.8.3Step 3: Set up environment variables
We first create soft link to the above extracted package.
ln -s ~/Applications/extracts/Miniconda3-py38_4.8.3 ~/Applications/MinicondaWe will now add the above link to environment variables.
echo 'export PYTHON_HOME=$HOME/Applications/Miniconda' | tee -a ~/.profile > /dev/null
echo 'export PATH=$PATH:$PYTHON_HOME/bin' | tee -a ~/.profile > /dev/null
Step 4: Test python installation
The above should allow us to use python now and also have 'conda' available to create python virtual environments. Either log off and log back in or use source command to load the updated profile.
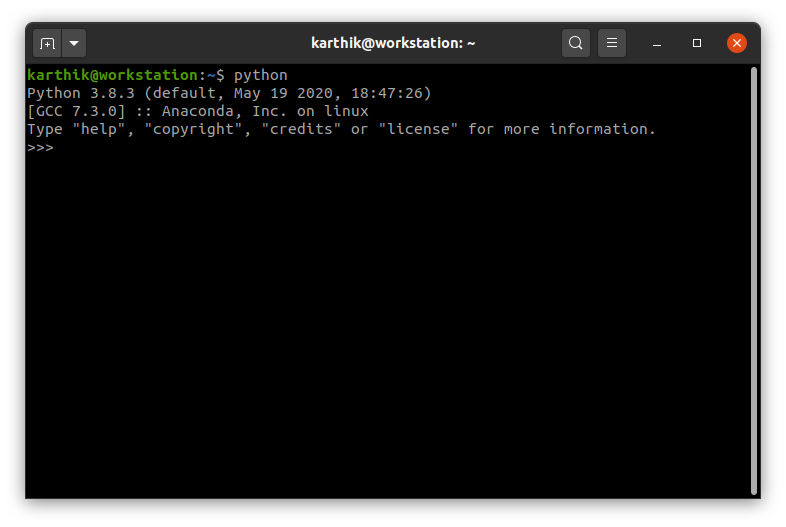
source ~/.profile pythonIf you see a python shell as shown below, congratulations. You have successfully installed python.

Step 5: Create a virtual environment to use for pyspark
You can definitely link the above python to spark, and start running pyspark. But I suggest not to. We will create a separate environment for it and use that environment to run.
Spark 3.x does support python 3.8.x, so we will create 3.8.3 environment for it. If you are using Spark 2.x, you should go with a python 3.7.x environment.
conda create -p ~/Applications/python_environments/python383env python=3.8.3I have named this environment python37env, but you can name it according to your project so you know which environment belongs to which project.
Step 6: Set up PySpark
Again, let's create a soft link to this environment and provide that link to pyspark.
ln -s ~/Applications/python_environments/python383env ~/Applications/PySparkEnvThe below environment variables will provide the path of above created environment to spark.
echo 'export PYSPARK_PYTHON=$HOME/Applications/PySparkEnv/bin/python' | tee -a ~/.profile > /dev/null
echo 'export PYSPARK_DRIVER_PYTHON=$HOME/Applications/PySparkEnv/bin/python' | tee -a ~/.profile > /dev/null
We will also need to provide spark python libraries to the environment, let's set up one more variable for that.
echo 'export PYTHONPATH=$SPARK_HOME/python:$SPARK_HOME/python/lib/py4j-0.10.9-src.zip:$PYTHONPATH' | tee -a ~/.profile > /dev/nullStep 7: Test PySpark
Now that we have set up all environment variables, let's test if it is working.
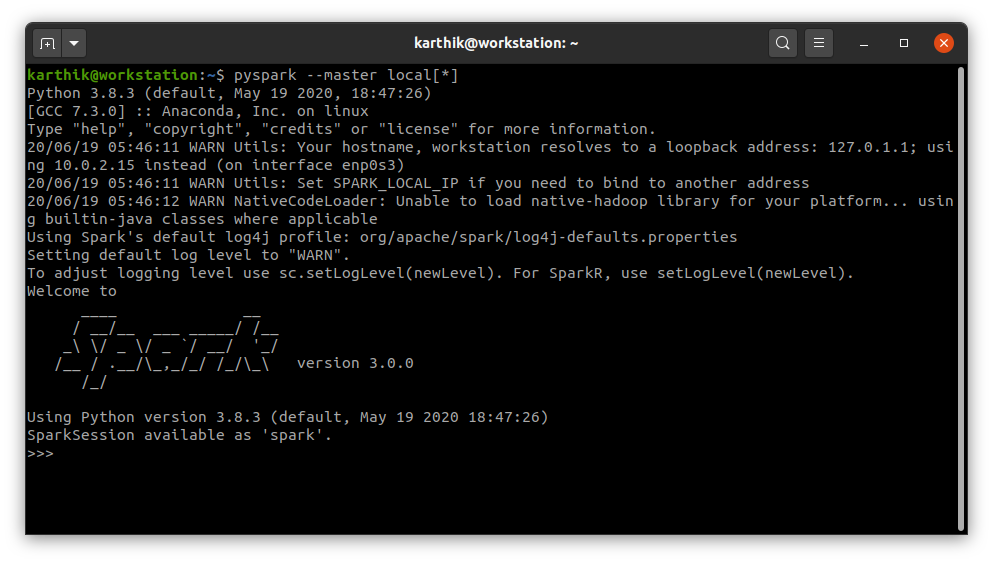
source ~/.profilepyspark --master local[*]If you get the spark shell as displayed below, you have successfully set up pyspark.

You can also switch python environments easily by unlinking the PySparkEnv and re-linking it to a different environment as below.
unlink ~/Applications/PySparkEnv
ln -s ~/Applications/python_environments/python36env ~/Applications/PySparkEnv
Step 8: Install Jupyter Notebook
Now that we have pyspark set up, let's also set up Jupyter notebook. You can very well skip this and the following steps if jupyter notebook is not a requirement for you.
We will have to install the notebook in the virtual environment we created, so let's first activate that environment and then run pip command to install the notebook.
source activate ~/Applications/PySparkEnv
pip install notebook==6.0.3
This should install all the necessary libraries to run jupyter notebook.
Step 9: Test jupyter notebook and pyspark support
We will always need to run jupyter notebook from the above said environment, so always activate the environment before running the below command.
jupyter notebookThis should run the jupyter notebook on your OS. You can visit http://localhost:8888 to view the UI and click on new to create a new notebook.
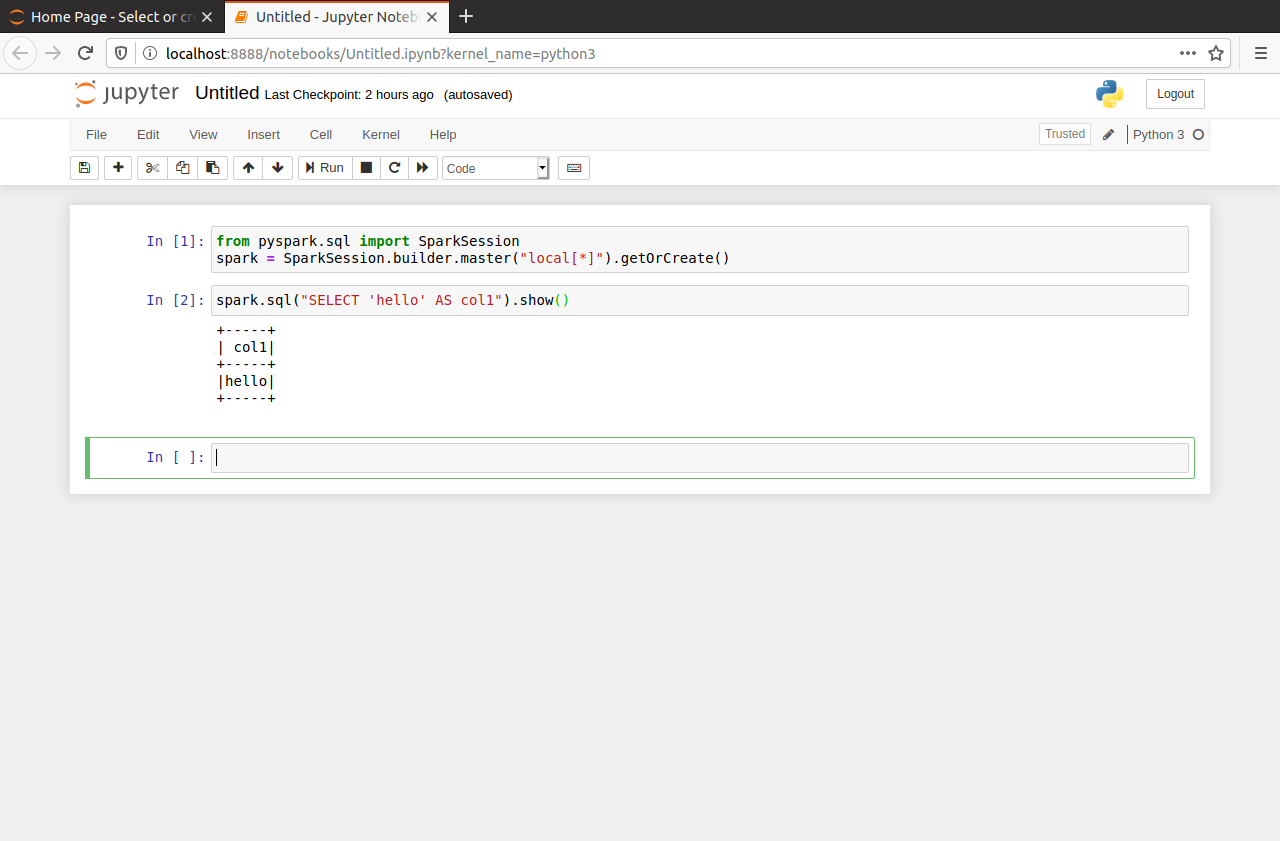
In the notebook, let's create a spark session and try to run a simple command to check if pyspark is working.
from pyspark.sql import SparkSession
spark = SparkSession.builder.master("local[*]").getOrCreate()
spark.sql("SELECT 'hello' AS col1").show()
If your screen looks like above, you have successfully installed Jupyter and got it to work with pyspark. Use below command to deactivate the selected python environment.
conda deactivateStep 10: Set Jupyter Notebook as default for PySpark
I seriously suggest you not to do this step, but if you think you will never work on pyspark shell and always work on Jupyter, go ahead by setting Jupyter as default.
To do this, we have to modify the already set PYSPARK_DRIVER_PYTHON environment variable to point to jupyter executable instead of python and also add PYSPARK_DRIVER_PYTHON_OPTS variable.
echo 'export PYSPARK_DRIVER_PYTHON=$HOME/Applications/PySparkEnv/bin/jupyter' | tee -a ~/.profile > /dev/null
echo 'export PYSPARK_DRIVER_PYTHON_OPTS=notebook' | tee -a ~/.profile > /dev/null
Step 11: Test Pyspark with Jupyter Notebook set as default
Let's use the same commands again
source ~/.profile
pyspark --master local[*]
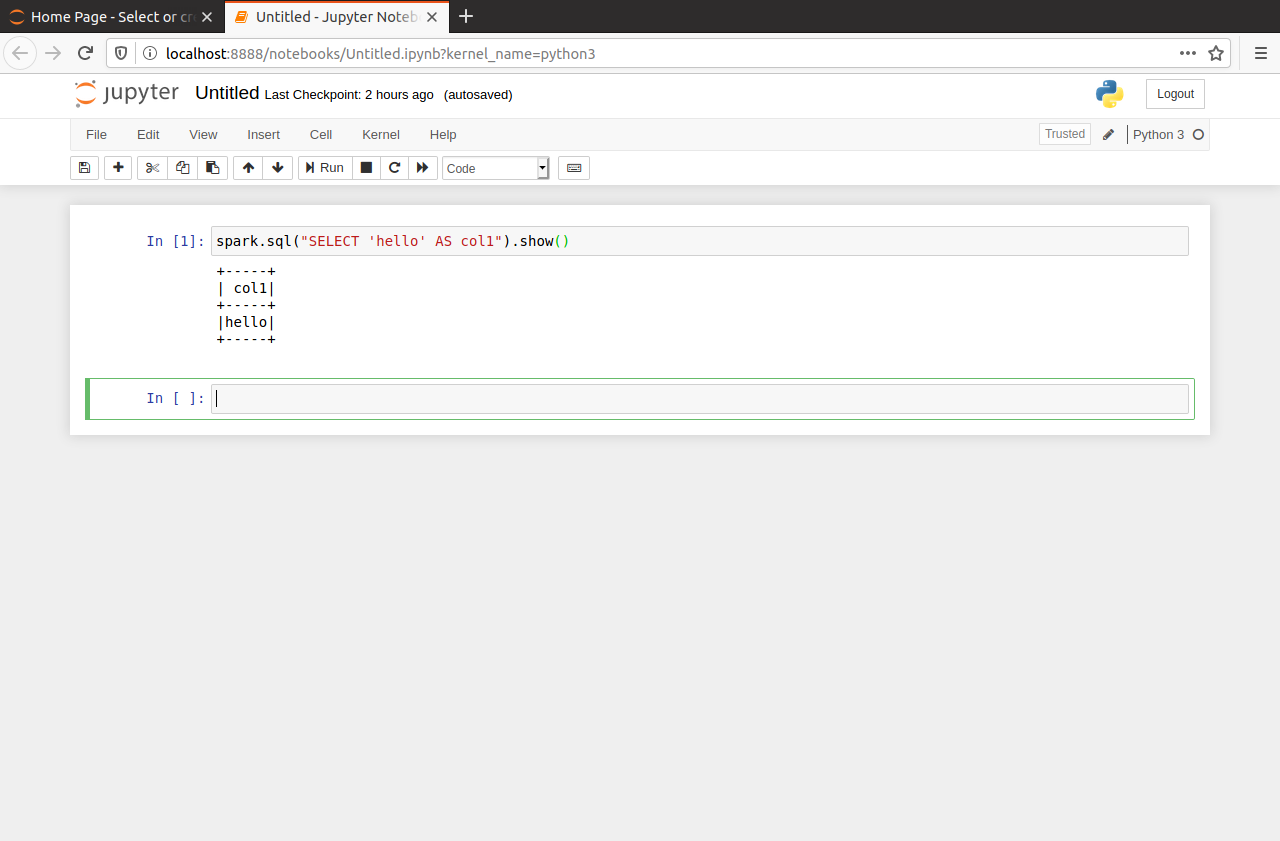
This should start the Jupyter notebook which you can access at http://localhost:8888. You will not have to create a spark session with this, you can directly run your spark code as shown below.

That is it. You should now have successfully installed JDK, Spark, Pyspark and Jupyter Notebook on your OS.
 I am Karthik, I am a software professional and love solving data problems. I work as a senior engineer in a gaming firm and in the past, have had the pleasure of taking startups from drawing board to production. In this blog, I intend to share my learnings and contribute to the community.