In our last post, we set up a hadoop cluster in pseudo distributed mode. However, bigdata projects are always a weave of multiple frameworks and tools. In this post, let us set up Apache Kafka, which is a distributed streaming platform.
Most Kafka setups are not independent. They depend on Apache Zookeeper, which helps in managing the cluster by providing a distributed configuration and synchronization service through a hierarchical key-value store.
There is already an issue open on JIRA to remove this dependency, as per KIP-500 (Kafka Improvement Proposals).
Let us now go ahead and set up Zookeeper, before we move on to Kafka.
Step 1: Create Directories, Download Apache Zookeeper and Extract
Again following the installation process from my previous post, let's create the required directories, download Zookeer from apache archive and extract it.
mkdir -p ~/Applications/extracts
mkdir -p ~/Downloads/packages
wget https://archive.apache.org/dist/zookeeper/zookeeper-3.6.2/apache-zookeeper-3.6.2-bin.tar.gz -P ~/Downloads/packages
tar -xzf ~/Downloads/packages/apache-zookeeper-3.6.2-bin.tar.gz -C ~/Applications/extracts
Step 2: Create Zookeeper soft link, configuration and set environment variables
We will now create a soft link to the above extracted directory, use the default configuration and set the necessary environment variables.
ln -s ~/Applications/extracts/apache-zookeeper-3.6.2-bin ~/Applications/Zookeeper
echo 'export ZOOKEEPER_HOME=$HOME/Applications/Zookeeper' | tee -a ~/.profile > /dev/null
echo 'export PATH=$PATH:$ZOOKEEPER_HOME/bin' | tee -a ~/.profile > /dev/null
source ~/.profile
mv $ZOOKEEPER_HOME/conf/zoo_sample.cfg $ZOOKEEPER_HOME/conf/zoo.cfg
That should do it for Zookeeper.
Step 3: Download Apache Kafka and Extract
Moving on to Kafka now, let's download and extract it. We will use Scala 2.12 compiled one, only because we have a spark installation that is compiled with Scala 2.12. You can choose other flavours here.
wget https://archive.apache.org/dist/kafka/${KAFKA_VERSION}/kafka_2.12-2.6.0.tgz -P ~/Downloads/packages
tar -xzf ~/Downloads/packages/kafka_2.12-2.6.0.tgz -C ~/Applications/extracts
Step 4: Create Kafka soft link and environment variables
Now that we have extracted, let's create the links and add necessary environment variables to the profile.
ln -s ~/Applications/extracts/kafka_2.12-2.6.0 ~/Applications/Kafka
echo 'export KAFKA_HOME=$HOME/Applications/Kafka' | tee -a ~/.profile > /dev/null
echo 'export PATH=$PATH:$KAFKA_HOME/bin' | tee -a ~/.profile > /dev/null
source ~/.profile
As simple as that. Kafka should be ready to run now.
Step 5: Start Zookeeper Server and Kafka Brokers
Before starting anything Kafka we need to have Zookeeper running. Let's go ahead and start the Zookeeper server.
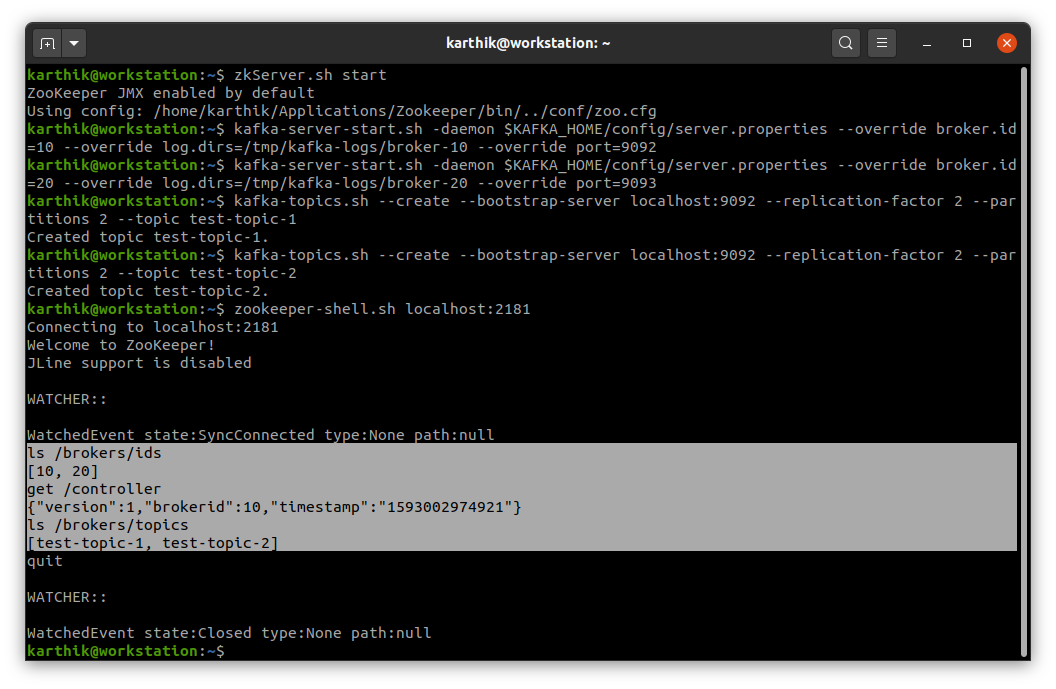
zkServer.sh startThat should start our Zookeeper server, you can verify by running the jps command and should see QuorumPeerMain process running.
Since we are running it locally, let us create two kafka brokers, with broker id 10 (on port 9092) and 20 (on port 9093). We will store the kafka log files in /tmp/kafka-logs.
kafka-server-start.sh -daemon $KAFKA_HOME/config/server.properties --override broker.id=10 --override log.dirs=/tmp/kafka-logs/broker-10 --override port=9092
kafka-server-start.sh -daemon $KAFKA_HOME/config/server.properties --override broker.id=20 --override log.dirs=/tmp/kafka-logs/broker-20 --override port=9093
You can verify if the brokers are running by using the jps command again. You should be able to see two Kafka services running, if not remove the "-daemon" flag and check what's the issue.
Step 6: Create Kafka Topics and Describe
Now that our brokers are running, let's create two kafka topics, each with two partitions and two replicas.
Let's also describe the topic to see more details.
kafka-topics.sh --create --bootstrap-server localhost:9092 --replication-factor 2 --partitions 2 --topic test-topic-1
kafka-topics.sh --create --bootstrap-server localhost:9092 --replication-factor 2 --partitions 2 --topic test-topic-2
kafka-topics.sh --list --bootstrap-server localhost:9092
kafka-topics.sh --describe --bootstrap-server localhost:9092 --topic test-topic-1
You should see the below output when you run the describe command.

Step 7: Checking through Zookeeper Shell
We can also get into Zookeeper shell and view our kafka brokers, topics and even the controller.
zookeeper-shell.sh localhost:2181
ls /brokers/ids
get /controller
ls /brokers/topics
Step 8: Verifying Installation
Now that we know all the required services are running, it's time to do what kafka actually is built for and verify if it is working fine.
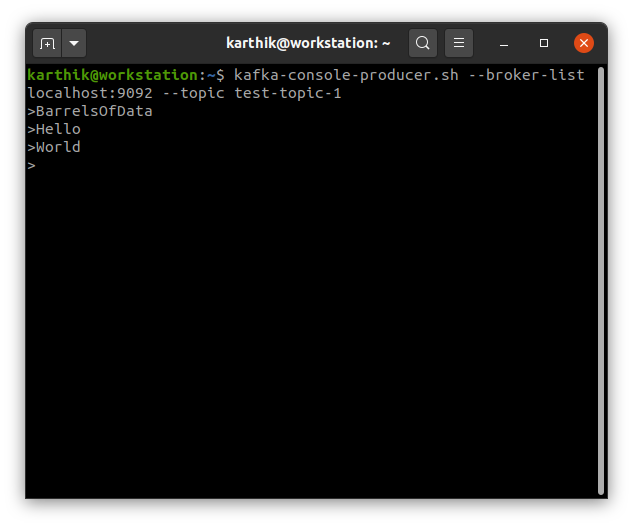
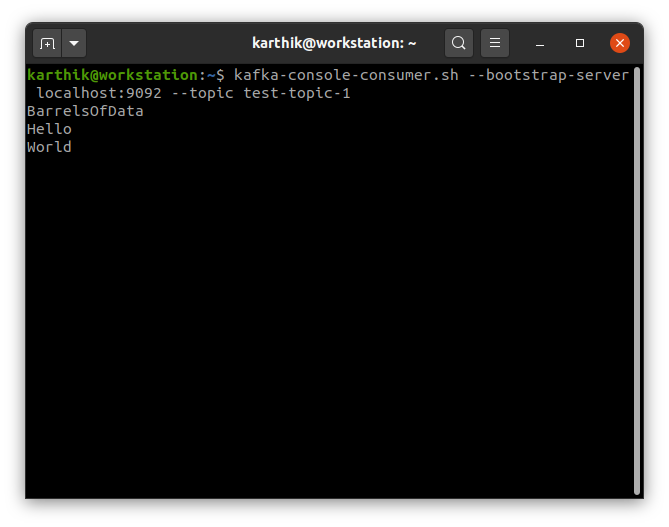
We will run a producer in one console and consumer in another. What we type/input in the producer should get picked up and displayed by the consumer.
kafka-console-producer.sh --broker-list localhost:9092 --topic test-topic-1kafka-console-consumer.sh --bootstrap-server localhost:9092 --topic test-topic-1

If you see this happening, you are now ready to build a lot of projects using Kafka.
To reset everything after you are done, you just have to delete the kafka-logs directory and zookeeper directory as shown below.
rm -r /tmp/kafka-logs
rm -r /tmp/zookeeper I am Karthik, I love exploring data technologies and building scalable data platforms.