Apache spark is one of the most popular framework for bigdata processing. It is fast and provides high level abstractions for distributed processing of data. Spark provides API in scala, java, python and R. It also supports other languagues through 3rd party projects.
This post will help you set up [apache spark on a linux based operating system. If you are using Windows, I suggest you download VirtualBox or any other virtualization software, create a virtual machine running any linux distro and get going.
Minimum system requirements
- 2 GB RAM
- Processor with atleast 2 core / 4 threads
- 1 GB free disk space to store extracted files
Other requirements depend on what kind of spark jobs you run post installation.
This installation will not require you to have root priviledges and is intended only for personal learning. There are a lot more things to be taken care of for enterprise deployments, which is out of scope for this blog post.
Being a developer, it is of good if you do not set up your environments at system level. So, this guide will be a tad bit more work, but you'll learn to appreciate it.
Installation Steps
Step 1: Install Java Development Kit [JDK]
Spark runs on JVM and depends on JDK, so our first goal is to download and install JDK. Spark 3.3.x and above versions support Java 17, so let us go ahead and install that.
Move to the next step if you already have JDK installed.
We will download the jdk libraries from temurin project, you can also use your own preferred JDK libraries.
wget https://github.com/adoptium/temurin17-binaries/releases/download/jdk-17.0.6%2B10/OpenJDK17U-jdk_x64_linux_hotspot_17.0.6_10.tar.gz -P ~/DownloadsNow let's create a general directory within your home path and extract the downloaded JDK binaries
mkdir -p ~/applications
tar -xzf ~/Downloads/OpenJDK17U-jdk_x64_linux_hotspot_17.0.6_10.tar.gz -C ~/applications
We have to create JAVA_HOME environment variable pointing to the extracted directory and also add it to the PATH variable. But we will not directly point this directory as it is version suffixed and will become a mess to switch versions later.
Instead we will create soft links and add them to the environment variables.
ln -s ~/applications/jdk-17.0.6+10 ~/applications/jdk
echo 'export JAVA_HOME=$HOME/applications/jdk' | tee -a ~/.profile > /dev/null
echo 'export PATH=$PATH:$JAVA_HOME/bin' | tee -a ~/.profile > /dev/null
Note that I did not put the environment variables in ~/.bashrc for a reason. The application you set up should be available across all shells to you and not just bash.
Step 2: Test Java Development Kit Installation
Now that we have extracted and set the environment variables, let us now check if it is working. You can either log off and login once or use the source command to use the updated profile, and then run the java command to check if it's installed successfully.
source ~/.profile
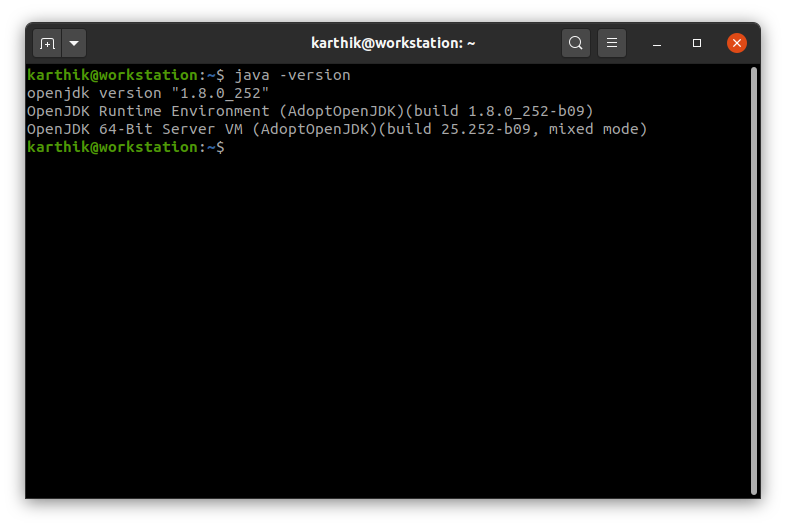
java -version
If you get a response like below, you have successfully installed JDK.

Step 3: Install Apache Spark
We will now install spark using similar steps as above. First, let's download it from apache archive
wget https://archive.apache.org/dist/spark/spark-3.3.2/spark-3.3.2-bin-hadoop3-scala2.13.tgz -P ~/DownloadsNote we are specifically downloading spark built with hadoop just to avoid having to install hadoop separately and make the integrations ourselves. This version of spark uses Scala 2.13. You do get spark packages in various other specifications. Head over to https://spark.apache.org/downloads.html to check out.
Let us extract the downloaded package
tar -xzf ~/Downloads/spark-3.3.2-bin-hadoop3-scala2.13.tgz -C ~/applicationsWe need to set SPARK_HOME and PATH variable. We will use the same approach that we used for JDK, i.e., create soft links.
ln -s ~/applications/spark-3.3.2-bin-hadoop3-scala2.13 ~/applications/sparkAdd environment variables
echo 'export SPARK_HOME=$HOME/applications/spark' | tee -a ~/.profile > /dev/null
echo 'export PATH=$PATH:$SPARK_HOME/bin' | tee -a ~/.profile > /dev/null
You might not run into situations where you need to switch JDK versions to check certain things, but you will run into those with Spark. To change spark version to a different one that you have downloaded and extracted, you can simply unlink the current one and create the same link specifying a different extract directory.
For example, to switch from spark 3.3.2 to spark 3.2.3
unlink ~/applications/spark
ln -s ~/applications/spark-3.2.3-bin-hadoop3.2 ~/applications/spark
This way, you can try multiple versions of spark with same set up without have to keep changing the environment variables.
Step 4: Test Apache Spark Installation
Again, you can either log off and log back in or use source command.
source ~/.profile
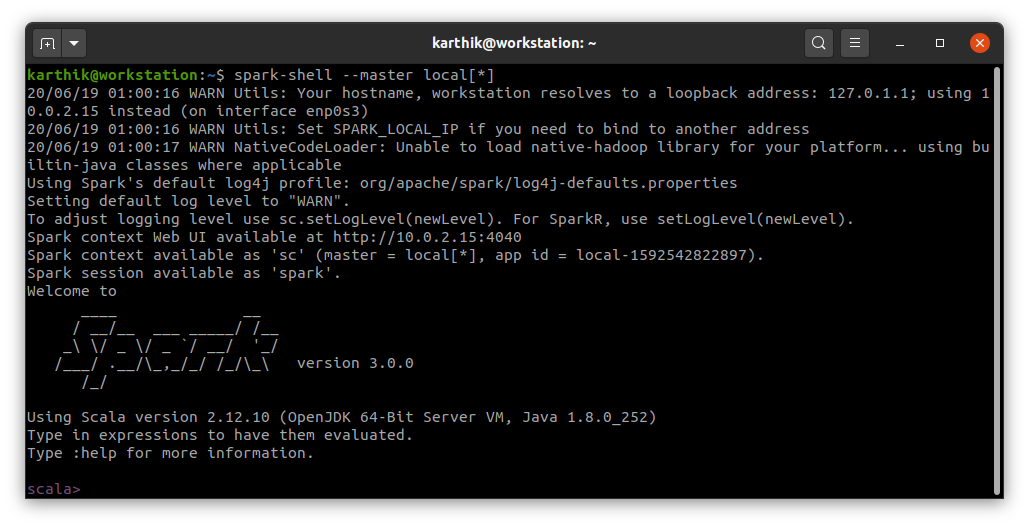
spark-shell --master local[*]
If you get a response like above, you have successfully installed Spark. If you use python, head over to pyspark set up guide.

 I am Karthik, I love exploring data technologies and building scalable data platforms.